You have no items to compare.
Welcome to DIY Sound Group

Details
NOTE: There were many people that asked for this kit to be available without the front panel so they could make their own cabinet or install it directly in the ceiling for Atmos use. So, if you are buying this kit by itself without the flat pack cabinet it will no longer include the front panel. Everyone ordered this kit with the crossover circuit board, so that's now included in the total cost of the speaker kit. Minimum order is 2.
The DIY community needed a small but powerful speaker that could be mounted just about anywhere and still keep up with much larger speaker models. We turned to Eminence for assistance and they designed us a custom 10" coaxial for high output and impressive power handling. The light weight cone gives this speaker a smooth sounding midrange even when played at high levels. The crossover was designed to give a response that not only excels for Atmos use, but also great for surround sound. The custom compression driver (tweeter) made by Celestion is installed on the back and fires through a small waveguide in the center of the woofer giving you a point source sound.
Product Notes:
The Volt-10 can be used in a sealed enclosure and extend down to 70hz, or in a ported enclosure to reach all the way down into the mid 40hz range. If needed, the Volt-10 can also be mounted directly in your wall or ceiling without an enclosure for Atmos or surround sound use.
These were designed to perform best when paired with a subwoofer that can handle the lower frequencies but a ported version will play down around 40hz for 2 channel music.
Product Highlights:
- Near perfect time alignment between woofer and tweeter
- Quality name brand components
- Custom professional grade 10" coaxial for high output
- Handles up to 450 watts and Sound Pressure Levels of 119db
- Great for surround sound in small sealed enclosures
- Can be used in small sealed enclosures or infinite baffle for Atmos and surround speakers
- Very easy speaker assembly

Minimum order is 2 speakers: If you ordered one in the past and need one for a center, please contact me. Kits are sold as full kits, sorry no substitutions or subtractions. Don't forget binding posts, terminal cups, or speaker spikes if you need them because they can be shipped for free with any kit or flat pack purchase.
Shipping Note: Most speaker kits currently ship for free, but flat packs normally do not. We try to get your order packaged and shipped in 5-8 days depending on how many orders have come in. Please read the 'Frequently Asked Questions' section for more information.
-
 Great speakers for surround and Atmos review by N173MM on 4/13/2026
I had four Volt-10s in the sealed enclosures and loved them. They performed very well as side/rear surrounds and later as Atmos. I ran briefly as LCR, and they were SO much better than my Klipsch RP-280F. The only reason I sold them was to upgrade to an all-Vortex system.
-
Excellent speaker for Atmos review by Michael on 2/13/2021
I echo all the reviews here. I used these for all the surrounds for a 7.2.4 Atmos setup. Sound absolutely incredible!
-
A Very Solid Speaker review by Jason on 1/26/2020
Bought these as my first DIY speaker build, and being a perfectionist, I was worried the build would be difficult or the sound wouldn’t be to my liking. Fortunately the build process was smooth, and the sound is quite wonderful, especially for the price. I’ve been testing them with music from a variety of sources, and the Volt-10’s definitely sound better, the better the source. I would certainly recommend these, both for the ease of the build and for the sound quality.
-
Review for Volt 10 review by chadsmith013 on 10/9/2019
not much else to say that hasnt been said..these are outstanding speakers..I replace my Volt 6s with a pair of these. The Volt 6's were great, I just wanted something a little larger. These things are loud, clear and dynamic. I plan on buying another pair real soon.
-
Best Surround Speakers I've Owned review by jevchance on 10/3/2019
These rears brought an amazing clarity and presence to my rear channel I honestly wasn't expecting. I read good reviews about them and they are all justified. The other day I was watching a movie with my family and my wife asked if I heard something upstairs. I paused the movie and the sound went away. We were both blown away by the presence these speakers offer. They do not have the wide stage offered by SEOS but its wide enough for my needs as rears in a 5.2 ATMOS setup. Highly recommend.
-
More than I expected review by Dylan on 9/8/2019
I ordered 4 with the atmos flat pack for surrounds. Was a little worried about crossing at 80hz in the atmos pack but I got 2 finished up with light stuffing threw them on an old amp in full range and pushed them to reference level and just wow. Did not expect them to be so good. I’m pairing with titan 615 fronts I own and think for surrounds they are perfect. Even in full range stereo these volts did well. They did start to distort at higher volume, but if crossed at 80 with a sub I would expect clear dynamic sound. Did a frequency sweep and even at 60hz in a small sealed atmos cabinet they hit pretty good. For reference I was in a hallway that is open to a very large room. When at the reference volume it shook the floor it sat on a little!! Don’t get me wrong you need a sub but if you have a wife and kids and want to watch a movie these could be used without one and you’d still be happy. When I get my next home I plan on 4 more of these for actual atmos speakers because I don’t think you can get anywhere near the performance of these without spending 2-4x the price. Also the flat packs were so nice over building you own just glued them with a light sanding. If your debating on these just buy them and you won’t be disappointed.
-
Everything I hoped they would be review by Paul on 3/9/2019
These are my first kit speakers, and I bought them as a pair of "testers" prior to going all in. Yes, I'm going all in as soon as the HTM-12s come back into stock.
Packaging and materials are impeccable and opening it felt like Christmas. Everything fits perfectly, it's very straightforward, and there's not a lot you can screw up. I did buy the PCB option and I'm glad I did. The small cost of the board is a huge timesaver and reduces the chances of making an error when soldering together the XOs. There's a video on Youtube showing the process for assembling the XO and it's basically you dry fit all the pieces, then go back and hot-glue them into place. Zip tie the big stuff, but have the connectors on the top side as the little feet are too short to allow a zip tie to reside under the board. When you're done fixing the components into place, flip the board over and heat the lead and pad a bit before feeding a line of solder into the iron. Stop once you have a nice puddle that covers the pad and it will cool quickly. Do all the leads and then snip them. Easy peasy, there's plenty of space to work with.
I got an angled flatpack and it all fit perfectly. They were CNCed perfectly. I used a card scaper to clean up any dried glue squeezeout, but a quick wipe when wet and a sanding when dry can do it for ya. Don't forget that "glue-up" rhymes with "screw-up" so be sure to do a practice run with your clamps FIRST. Once you have your clamping strategy down then you undo it all, apply glue, and clamp with confidence. Under no circumstances should you apply glue and then try to figure out what the heck you're doing with the clamps. You will run out of time and won't be happy.
As for the performance, I'm going to be using these as rears mounted on the wall directly above the second, and last row in my theater. There's a bit of upper frequency falloff when moving off-axis, but it's not jarring and it's gradual. As surrounds they're just fine. More than fine. I'd call them overkill. I've got them as mains right now for testing purposes on my downstairs setup and took a picture of one sitting on a Velodyne CHT-12. From the front they're almost the same size. I tried running them paired up with my Martin Logan center and it was just sad so I turned it off and right now my downstairs setup is centerless. If you want theater impact, these things deliver.
Don't be like me and underestimate how large these things are, they're not small. Measure for real. They're not cube sats by any stretch of the imagination, they're beasts. Some people use them as mains and I can understand why. If I had to do it again I might have gotten the 6s instead.
If you want something that sits on a side-wall then don't forget that the HT lineup exists as well. They have the same compression driver and should mix in well. The SEOS waveguide should give better off-axis performance. -
Great speakers! review by Randy on 1/4/2019
I just recently built some sealed Volt 10 v2’s for LCR and am absolutely loving them!! I built them mostly for HT use, but the first day we fired up some music “real quick” to make sure they were built correctly. “Real quick” turned into a three hour session cranking our favorite songs, it was a blast!
Since then we have also played video games, watched TV, and watched a couple movies with them, and they do not disappoint. Combined with the volt 6’s I built last year, the experience is a ton of fun.
Highly recommended! -
Great sound and easy to build review by Joonas on 11/14/2018
These were my first DIY-speakers, thanks to the flat packs and assembled crossovers putting them together was very easy for a newbie like me. I have been running them as mains paired with a subwoofer in my parent's living room and the sound quality you get for the price is just great. Also want to commend Erich's amazing packaging skills, as the Volt and Titan kits I ordered spent six weeks in a shipping container to Finland and arrived here in perfect condition. Thanks Erich and DIYSG for making DIY easy, I am sure I will never buy commercial speakers again!
-
Volt 10's v2 for "Atmos/height" speakers review by Bigger IS better. on 8/2/2018
Most think that small height speakers are all you need and that there is no benefit to using a larger speaker for those height job duties. To some extent that is true but there are many advantages to using a well defined larger speaker such as a Volt 10 for your height speakers.
Height speakers produce some very mixed sounds, all simultaneously, so the better those speakers are the more the details will come out.
I replaced my four Klipsch RP-140s with four Volt 10 V2's and the difference was far more that I was expecting. Clear, more defined, and with a larger coverage area all make those height sounds seem even more realistic.
The design of the Volt 10's with the compression driver threading into a hole in the driver magnet is so unique its a shame there isn't a way to show it off. One of the easier kits to build, even with the angled flat pack.
The Volt 10's make me want to go to a 7.4.6 (currently 7.4.4) system so I can build a couple more of them. -
Great Speakers review by Urlryn on 5/11/2018
This is my second set of DIY speakers from DIYSound group. Shipping/Packing was great and everything came in perfect. As of this posting I've had the speakers mounted (rears and sides) using the angled flat pack for about 2 days. So far they sound great and they completely blow my previous little speakers out of the water. Well worth the price!
-
Wonderful addition to my Theater. review by Luke on 4/20/2018
I'm just going to re-iterate what everyone else has said here about the Volt 10's. They are absolutely wonderful with great detail and range for surround speakers. I have built subs in the past, but this is my first DIYSG build and what a wonderful experience it was. I'm hooked and plan on building some more speakers soon. Since this was my first, I opted for the angled Flat Pack and Assembled Crossover. The shipping and packing of the materials was perfect, customer service was always very responsive and everything arrived clean, new and safe. The flat pack lined up perfectly and was a breeze to glue together. This set is replacing my existing Klipsch R-14s speakers, but I plan on building two more in angled flat packs for the rear and then building some overhead Atmos versions as well. Thanks DIYSG!!!!!
Image not uploaded yet
| Speaker Kit Information |
| Model: | Volt-10 |
| Designer: | Matt Grant |
| Frequency Response: |
70hz - 20khz (sealed) 45hz - 20khz (ported) 75hz - 20khz (Atmos) |
| Power Range: | 10 - 450 watts |
| Sensitivity: | 95db - 2.83v/1m |
| Impedance: | 8 Ohm |
| Tweeter: | Celestion |
| Crossover Point: | 2000hz |
| Woofer: | Denovo Audio CX-10 |
| Enclosure Type: | Ported or Sealed |
| Dimensions: | Varies by design |
| Kit weight (no cabinet): | About 15 pounds |
| Assembled weight: | About 23 pounds |
Price Break Down:
1 - 10" Custom Eminence coaxial: $139.991 - Celestion compression driver: $59.001 - Custom crossover board: $6.001 - Set of crossover parts: $29.851 - Set of screws: $.50Packaging Material: $4.00
Paypal Fee: $6.93
Retail Cost: $246.27
Discount Cost: $209.00 and shipped for free
Specific Volt-10 Assembly Notes:
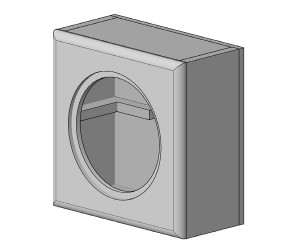
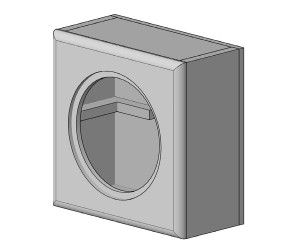
A great Volt 6, 8, and 10 assembly thread has been put together to help you build these popular designs. Click here for all the information and pictures. Your enclosure should be built with 3/4" thick material and the included 3/4" thick baffle to the dimensions listed under the specifications tab. If you do not order a specific flat pack the standard front baffle is 14" x 14" so you can build a sealed .7cuft enclosure at 9.25" deep. You should have one horizontal "window pane" style brace towards the center of the standard enclosure. No brace is needed for the angled surround design. It is recommended that you lightly fill the enclosure with polyfill or some type of loose insulation as long as you don't block the ports. Please be sure to read the general tips below before starting your build.
Recommended Tools and Supplies:
- Quality wood glue like TiteBond.
- At least 2 clamps 12" wide or bigger.
- Soldering Iron and solder unless there is an optional assembled crossover for your kit.
- Wire cutters
- Screwdriver
- Drill to predrill all screw holes.
- Sanding block or power sander.
- About 3' of speaker wire to connect your woofer and tweeter to the crossover board.
General Tips:
Crossover Assembly:
- VERY IMPORTANT - Inductors are the parts that look like small rolls of copper wire. Notice that the two ends of wire are silver and have been 'tinned' with solder. Those are the parts of the inductor that you should be soldering to, so don't cut it off to get to the copper colored portion. Inductors should not be installed directly next to each other on your board.
- None of the crossover parts have a positive or negative side so it doesn't matter which way they are facing when you assemble your crossover. 16-18 gauge wire is thick enough to use for your crossover or to go from your crossover board to the woofer or tweeter.
- Your crossover can be assembled on a thin piece of MDF or pegboard if the kit doesn't come with a circuit board.
- It doesn't matter where you put the crossover inside your speaker. You could mount it on the outside if you wanted to.
- Normally you wire red wires to positive and black wires to negative. If (and only if) your crossover schemtaic has a note saying 'Inverted Polarity', that means you need to connect the negative from the crossover to the positive on the tweeter and positive from the crossover to the negative on the tweeter. This is only done on some tweeters, not woofers.
- Click Here for a good assembly video by Matt Grant.
Screws and Gaskets:
- Predrill all screw holes with a bit that's slightly smaller than your screws to prevent the wood from splitting. Most screws are #8 panhead and you can use a 7/64" or 1/8" drill bit. Overnight Sensations use a #6 panhead so you can use a 3/32" bit.
- VERY IMPORTANT: Protect your woofer or tweeter when installing screws because you don't want the screwdriver to slip and puncture one of your components....that will ruin your day! Consider putting your free hand next to the screw to cover up the edge of the woofer or tweeter.
- If your kit comes with gasket tape, it should be applied to the back of the waveguide. Peel the paper off the back to expose the sticky side and slowly work it around the perimeter on the back side of the part. Some woofers will need gasket tape as well.
Stuffing or Lining the Speaker Cabinet:
- If your speaker or subwoofer is a sealed cabinet, most designers recommend that you lightly fill the inside with polyfill (pillow stuffing). If you don't have polyfill, then you can line the walls with 1" - 1.5" thick light weight open cell foam (like acoustic foam) or fiberglass insulation. You can also use 2-3" recyled denim insulation that can be bought at Home Depot.
- It's okay to cover up your crossover with the polyfill, insulation, or foam.
- If you're using a ported enclosure you should lightly fill the cabinet with polyfill and be sure not to block the ports. If you do not have polyfill then line the walls with 1" - 1.5" thick open cell foam (like acoustic foam), 2" - 3" of denim insulation, or 2" - 3" thick poly batting.
- Some of the speaker designers like to lines the walls of their ported enclosures with a 1" - 1.5" acoustic foam, and then lightly fill the remainder of the cabinet with polyfill. If this is a required method, it will be listed at the top of the page under 'Assembly Notes'.
Links to Build Threads for this Speaker:
Frequently Asked Questions:
* Where does the tweeter go? Answer: It screws into the back of the woofer.
* Do I need to use a subwoofer with these? Answer: Yes, these were designed to be used with a subwoofer.
* Where should I put the assembled crossover? Answer: The crossover can go anywhere inside the cabinet as long as you don't block the ports on the ported version.
Also Purchased